๐Ÿ“‹ Step-by-Step Guide ยท 2026

How to Apply E-Khata for Panchayat Limit Through E-Swathu 2.0

A complete guide to obtaining your eKhata online for Gram Panchayat limit properties in Karnataka โ€” no agent required.

๐Ÿ—“ Updated: May 2026โฑ 15 min read ๐Ÿ“ Karnataka, India๐ŸŒ eswathu.karnataka.gov.in

What is E-Khata and Why Do You Need It?

An E-Khata (eKhata) is a digitally issued property ownership certificate by the Karnataka government for properties that fall under Gram Panchayat limits. It is now generated online through the E-Swathu 2.0 portal, managed by the Rural Development and Panchayat Raj Department (RDPR), Government of Karnataka.

E-Khata is mandatory for property tax payment, sale/purchase of land, obtaining bank loans, building plan approvals, and any legal transfer or mutation of rural/panchayat properties. The E-Swathu 2.0 portal enables citizens to apply for eKhata entirely online.

๐Ÿ“ Documents & Information You Will Need

Registered Mobile Number (Aadhaar-linked preferred)
Sale Deed / Registration Number from Kaveri
Aadhaar Card (for e-KYC of all owners)
Property location details (District, Taluk, Panchayat, Village)
Property photograph (JPG/JPEG, max 500KB)
Asset Number (if available)
Nearest landmark to the property
Pincode & postal address details

Step-by-Step: E-Khata Application on E-Swathu 2.0

Follow these 13 steps in order. The entire process can be completed in one sitting if you have all documents ready.

1

Search and Open the E-Swathu 2.0 Official Portal

Open your web browser and search for "eswathu 2.0" on Google. Click on the official result from eswathu.karnataka.gov.in, the Government of Karnataka's E-Swathu portal maintained by NIC.

Tip: Always access the portal directly via https://eswathu.karnataka.gov.in to avoid phishing sites.
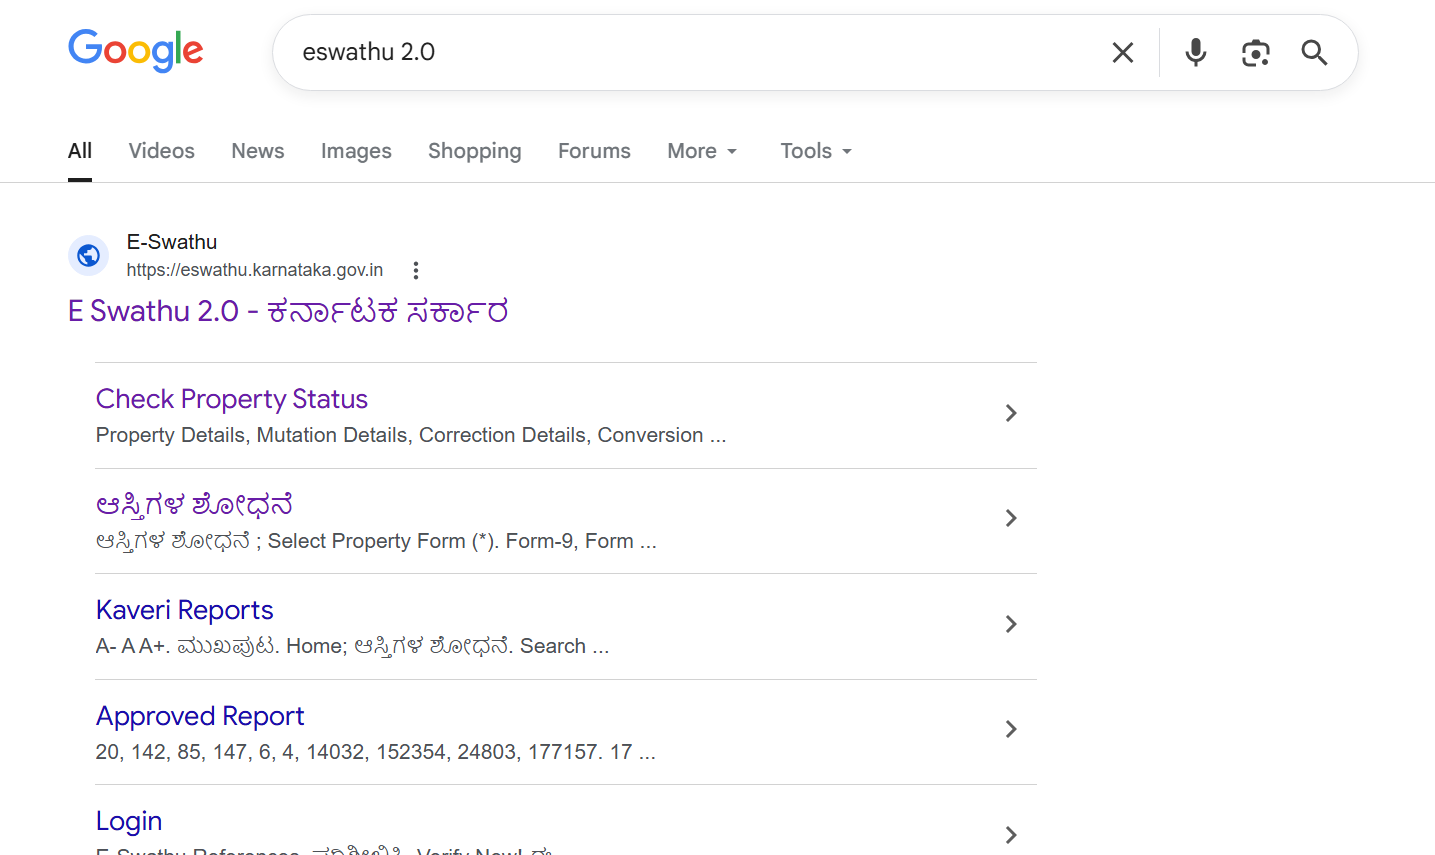
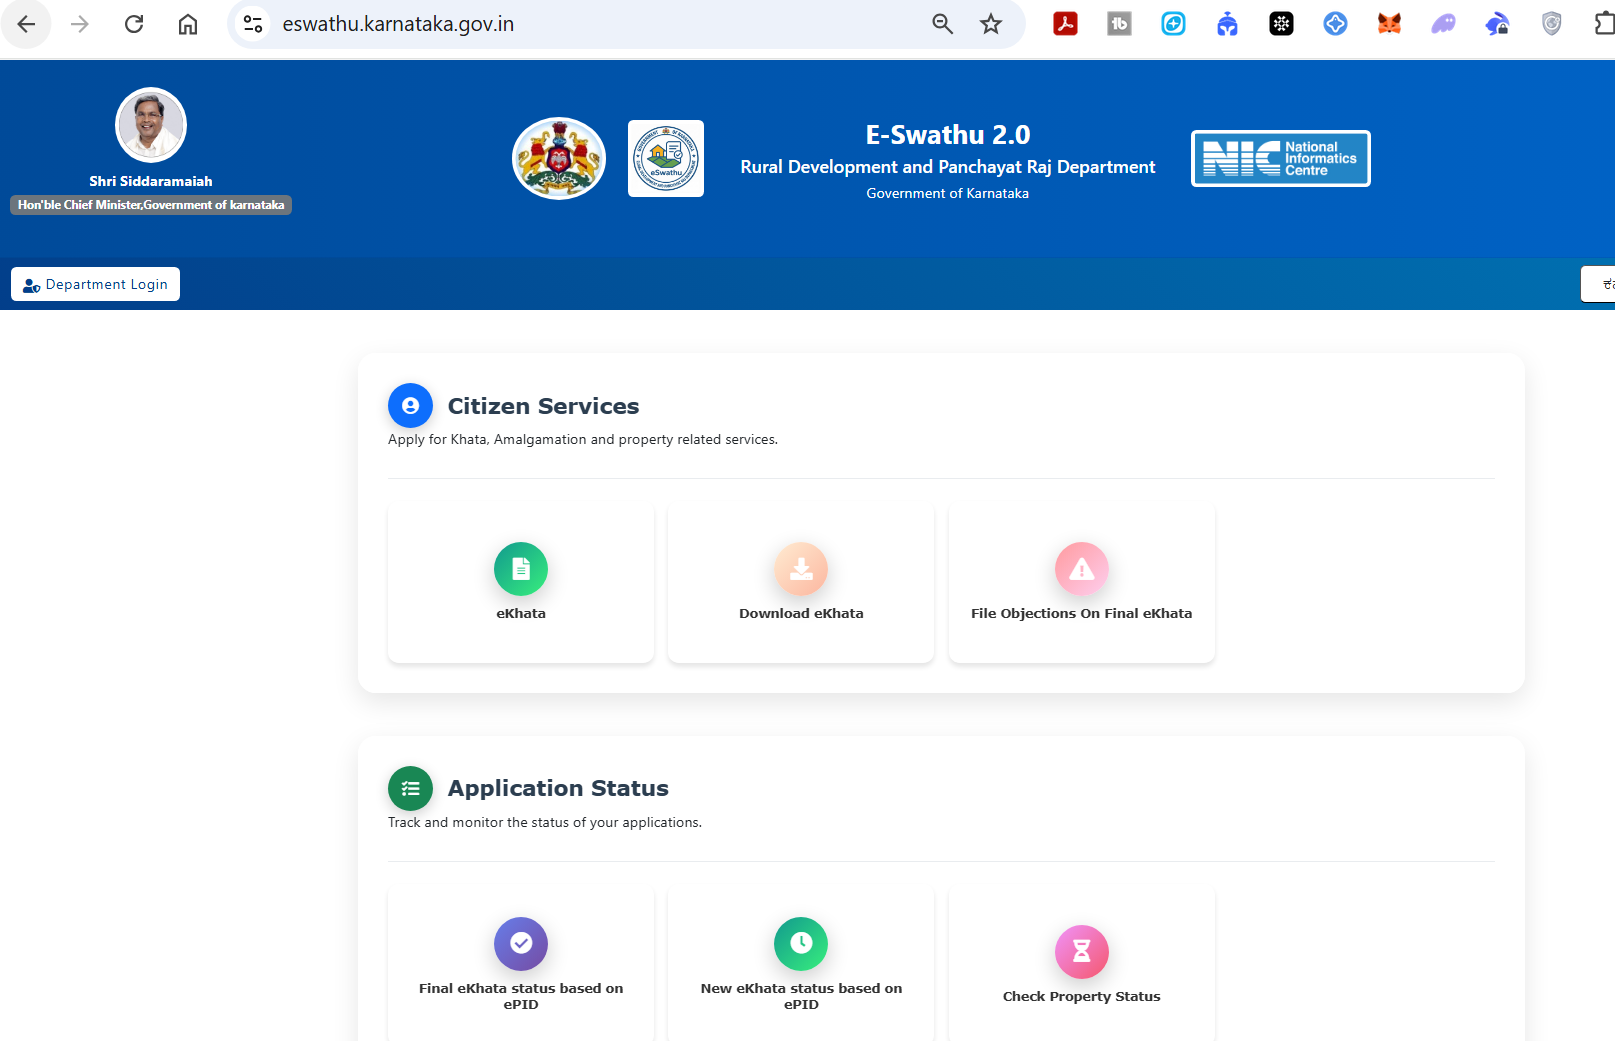
Searching for E-Swathu 2.0 on Google
Fig 1: Search for "eswathu 2.0" on Google and open the official Karnataka government portal
2

Navigate to Citizen Services โ†’ eKhata

Once on the E-Swathu 2.0 homepage, click on the eKhata tile under the Citizen Services section.

The homepage also shows Application Status options to track existing applications using ePID.
E-Swathu 2.0 homepage โ€” Click eKhata
Fig 2: E-Swathu 2.0 homepage โ€” under Citizen Services, click on eKhata
3

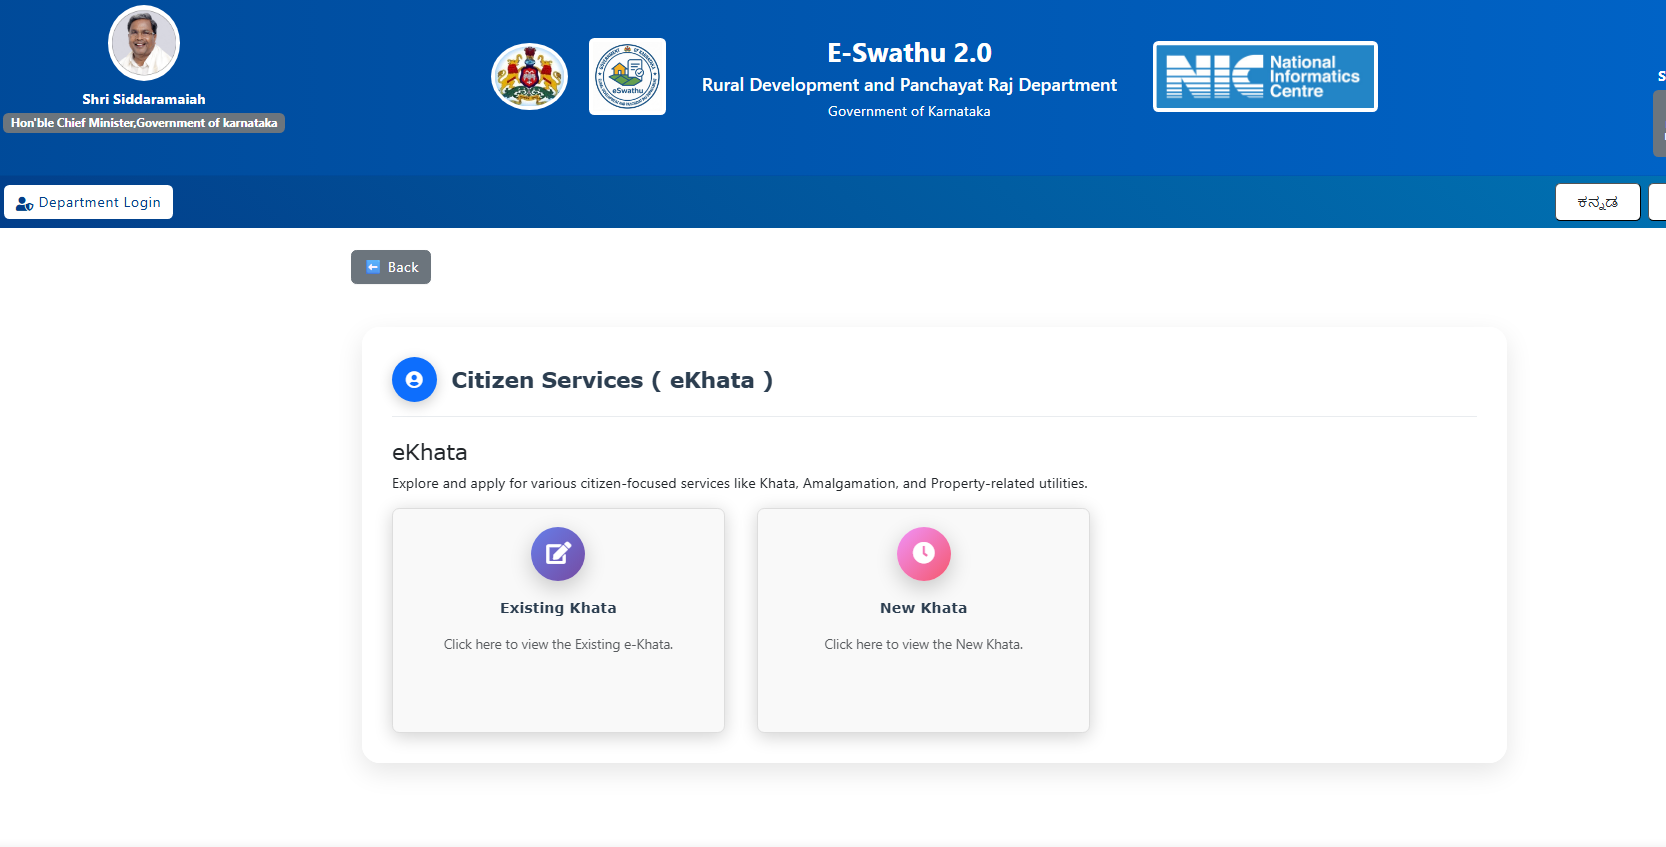
Choose Between "Existing Khata" or "New Khata"

Existing Khata โ€” for properties that already have a Khata. New Khata โ€” for first-time applications. Select New Khata for panchayat limit properties without an existing Khata.

E-Swathu eKhata โ€” Choose Existing or New Khata
Fig 3: Select "New Khata" for a first-time eKhata application
4

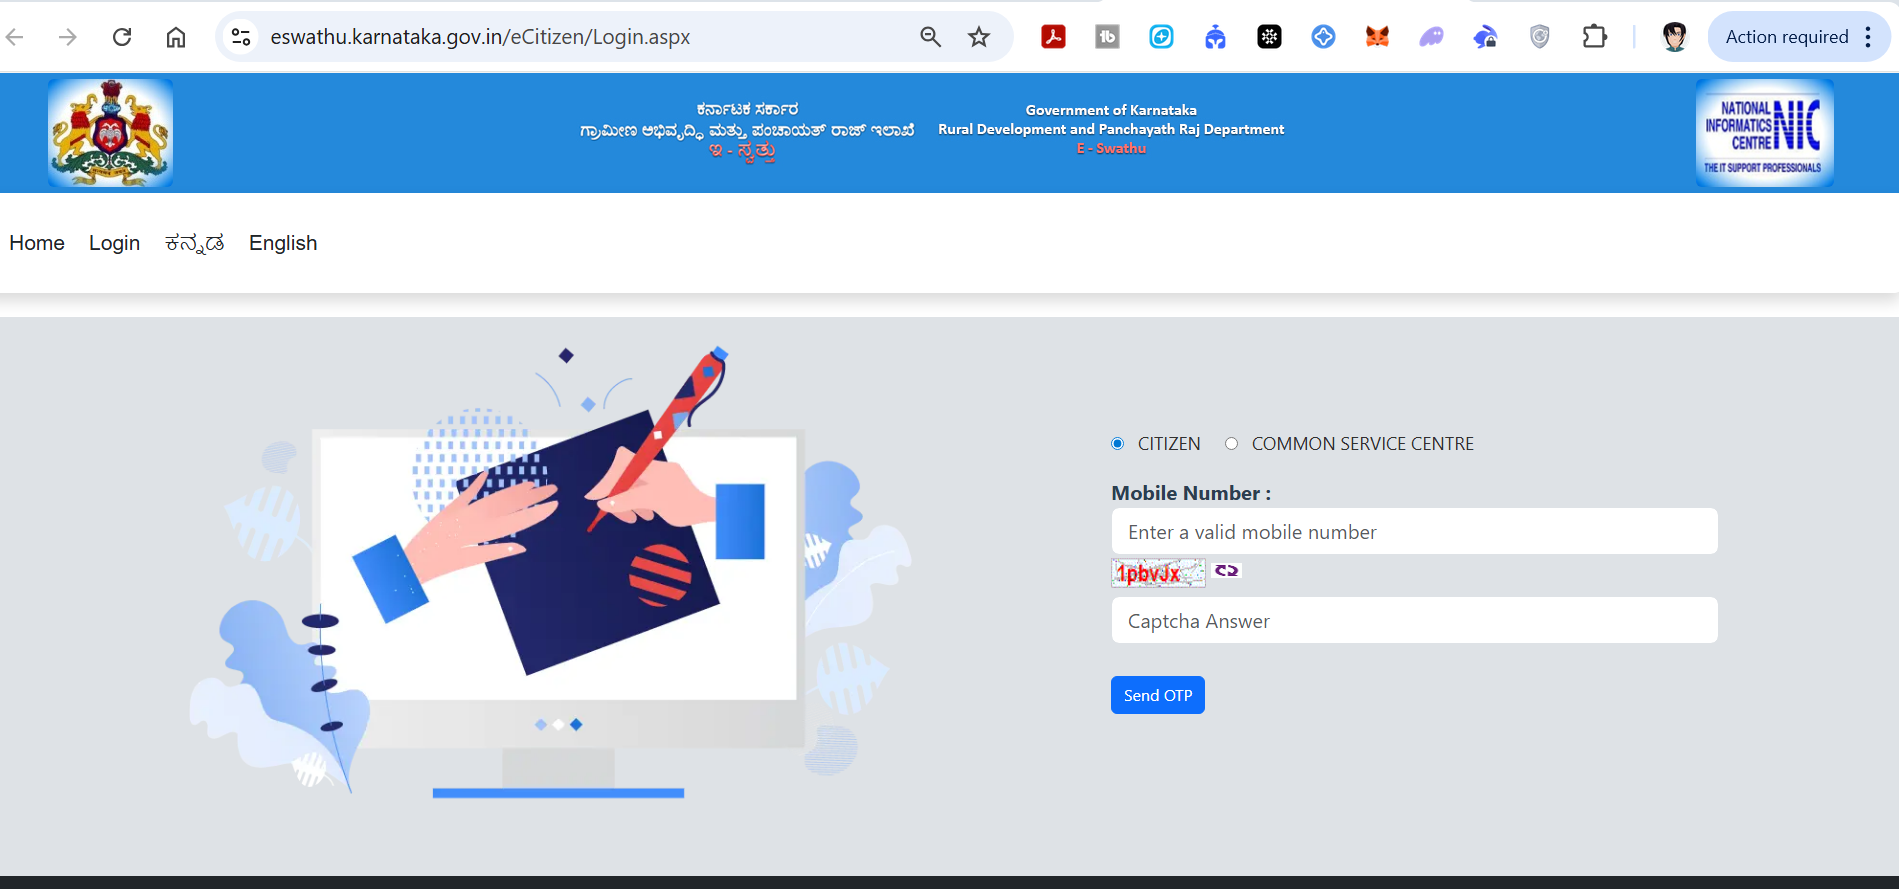
Login with Your Mobile Number (OTP Verification)

Select the Citizen option, enter your mobile number, solve the CAPTCHA, and click Send OTP. Enter the 6-digit OTP received on your mobile to complete login.

โš ๏ธ Use the mobile number linked to your Aadhaar to avoid issues during e-KYC verification.
E-Swathu Login โ€” Enter mobile number and OTP
Fig 4: Login using your mobile number โ€” enter OTP to verify your identity
5

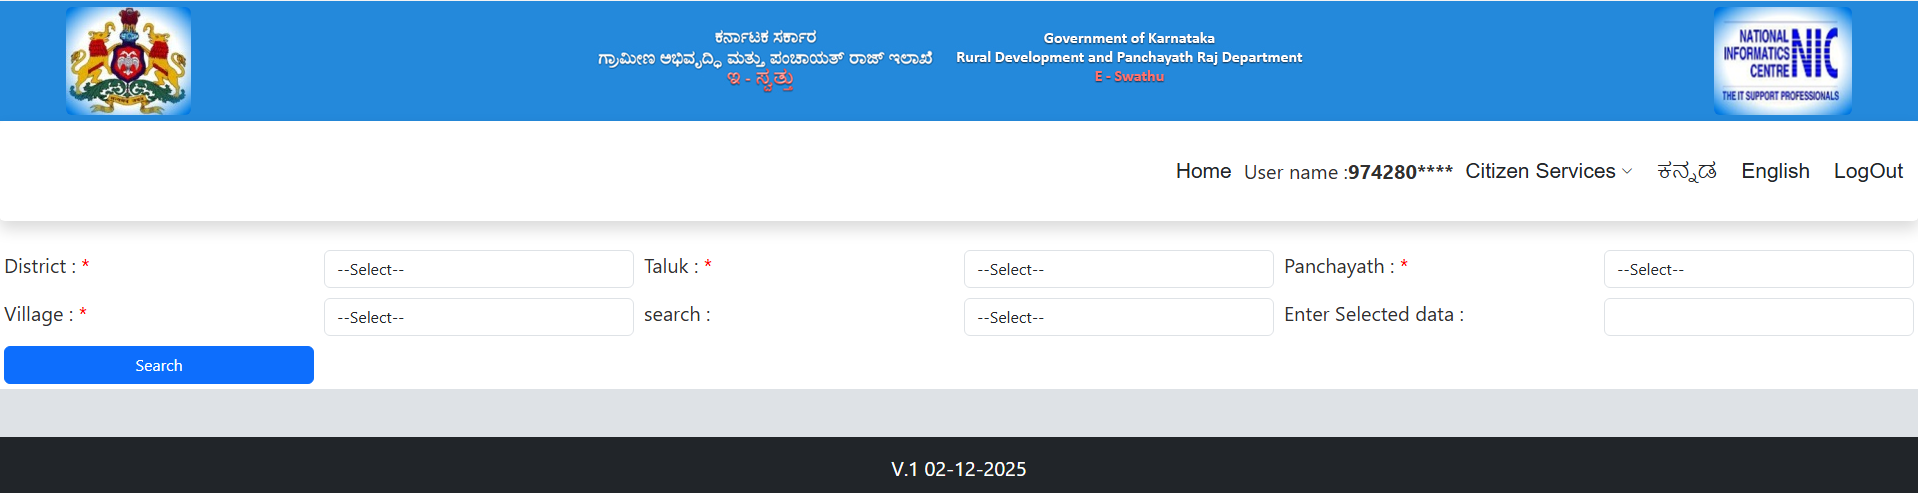
Select District, Taluk, Panchayat & Village

Select your property's District, Taluk, Panchayat, and Village from the dropdown menus. Click Search once all fields are filled.
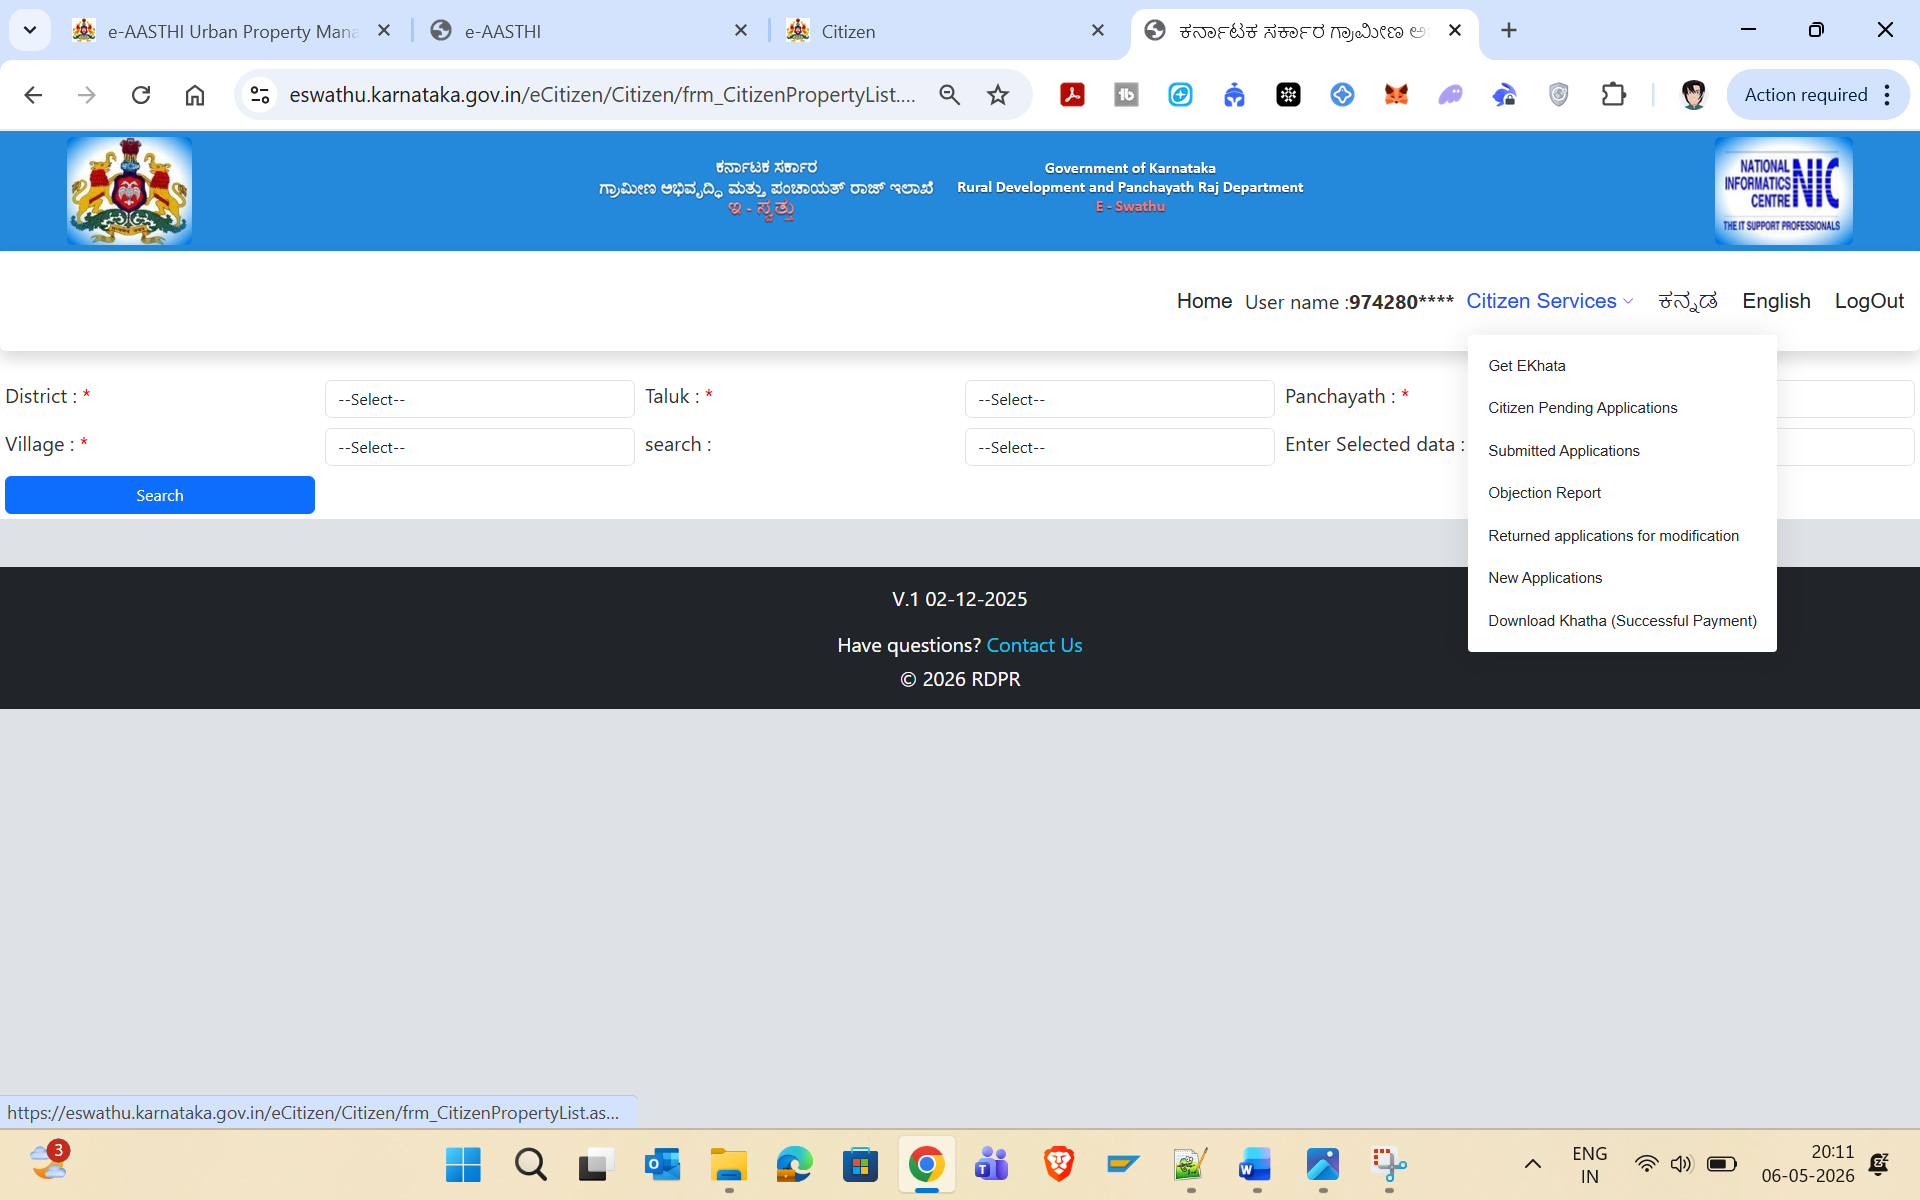
Important: Ensure the Panchayat and Village match exactly with your sale deed / registration document.
E-Swathu property search โ€” Select location
Fig 5: Select District, Taluk, Panchayat and Village to locate your property
6

Click "Citizen Services" Menu โ†’ Select "New Applications"

Click on the Citizen Services dropdown in the top navigation bar and select New Applications to begin a fresh eKhata application.

Citizen Services dropdown โ€” Select New Applications
Fig 6: Under the Citizen Services menu, click "New Applications"
7

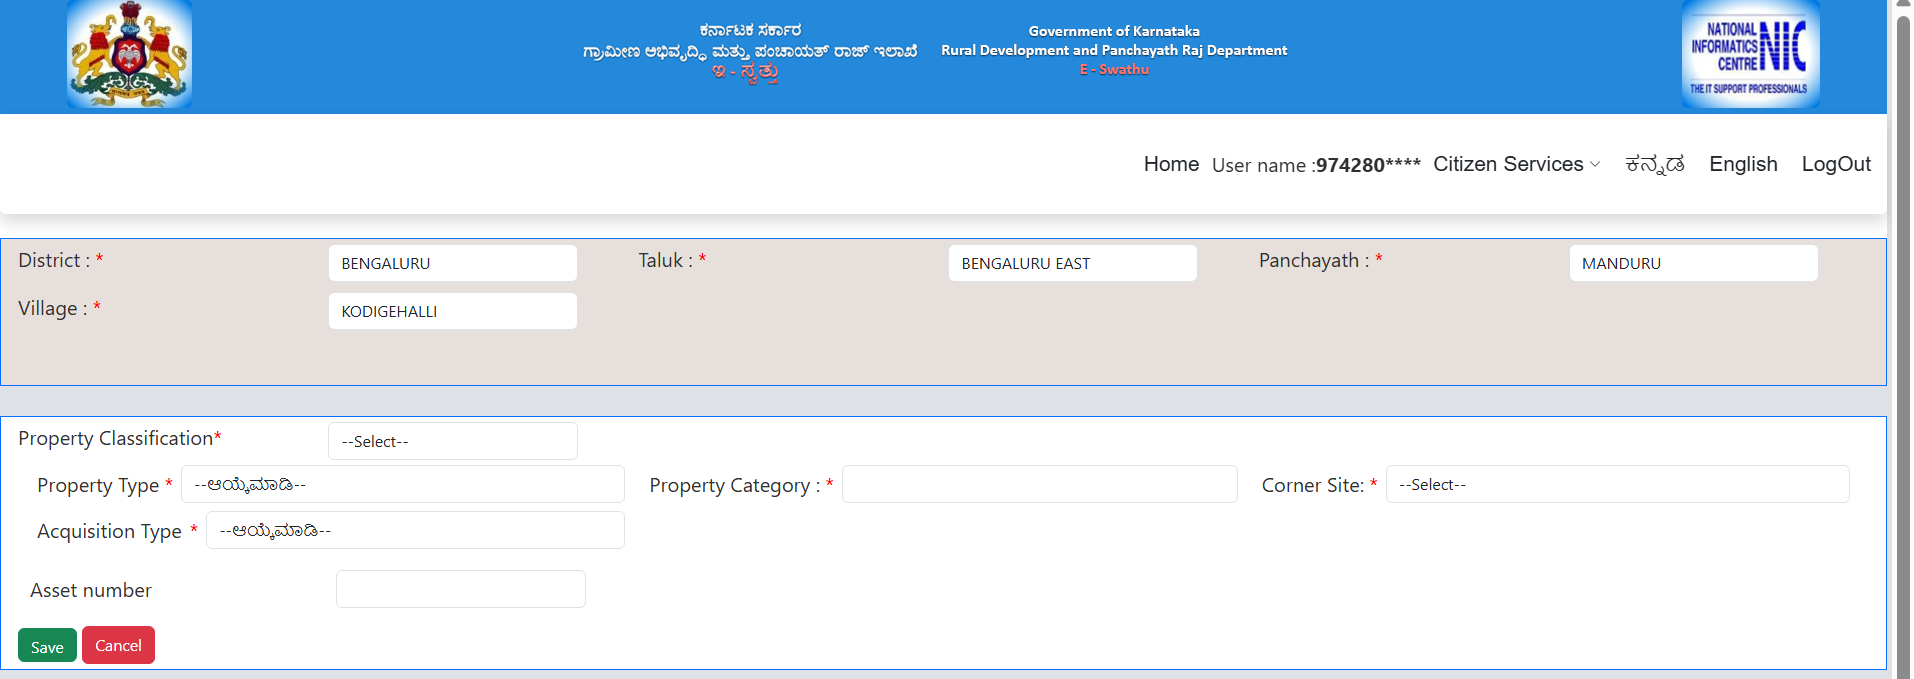
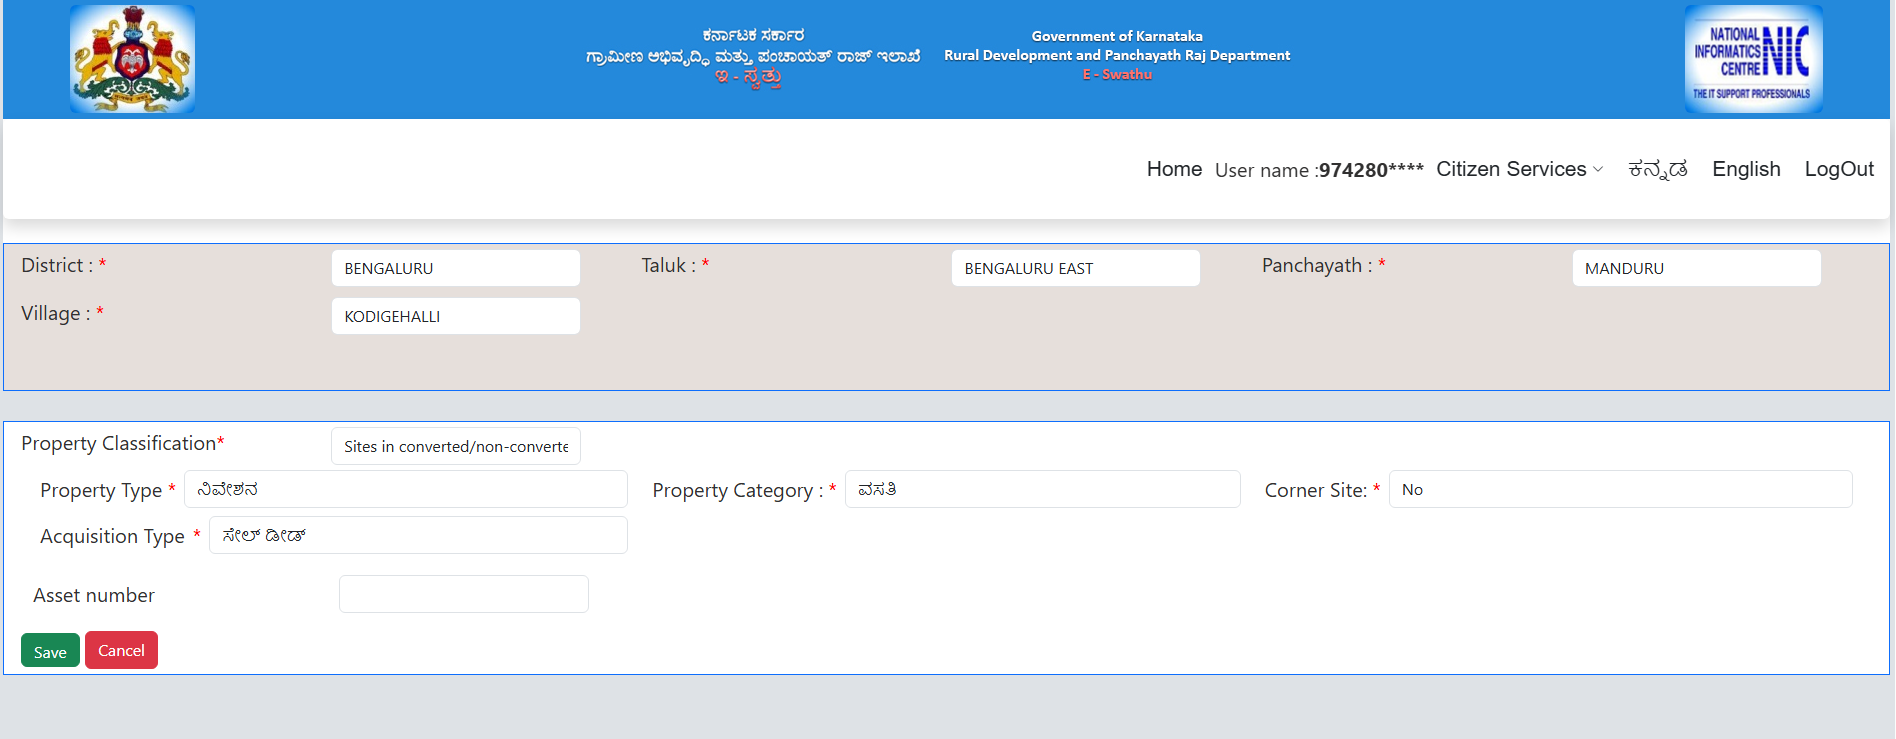
Enter Property Classification and Type Details

Fill in: Property Classification, Property Type, Property Category, Corner Site (Yes/No), and Acquisition Type (e.g., Sale Deed). Enter the Asset Number if available, then click Save.

E-Swathu Property Classification form
Fig 7: Select Property Classification, Type, Category, Corner Site and Acquisition Type
E-Swathu property details filled
Fig 7b: Example of filled property classification details
8

Enter Sale Deed Registration Number (Kaveri Integration)

If your property was registered after 01-04-2004, select Yes and enter the Registration Number from your sale deed. Click Get Property Registration Document โ€” the system fetches your deed details directly from the Kaveri database. Click Proceed Next.

โœ… The Saved Deeds table will show: Registration Number, Nature of Deed, Article Type, Registration Date, and Area in Sq.Mt. and Sq.Ft.
E-Swathu Kaveri registration deed โ€” personal details blurred
Fig 8: Enter your sale deed registration number to auto-fetch details from Kaveri (personal details blurred)
9

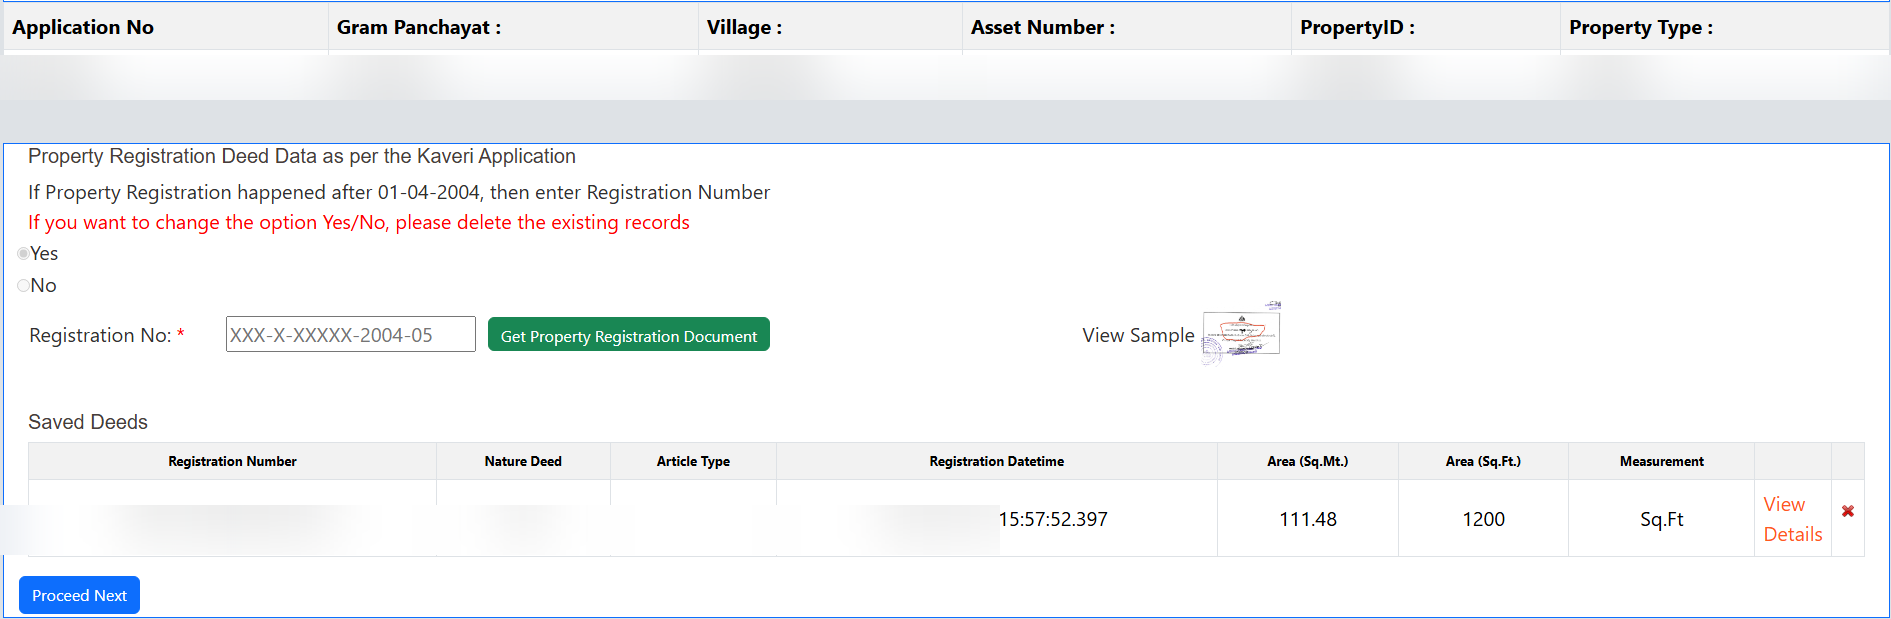
Confirm or Object to Area Details from Kaveri

Option A: Accept the area โ€” select if the area shown matches your deed. Option B: Object โ€” only if you disagree, but this will be referred to the PDO causing delays. Click Proceed Next.

E-Swathu area confirmation โ€” Accept or Object (personal details blurred)
Fig 9: Accept or object to the area details fetched from Kaveri (personal details blurred)
10

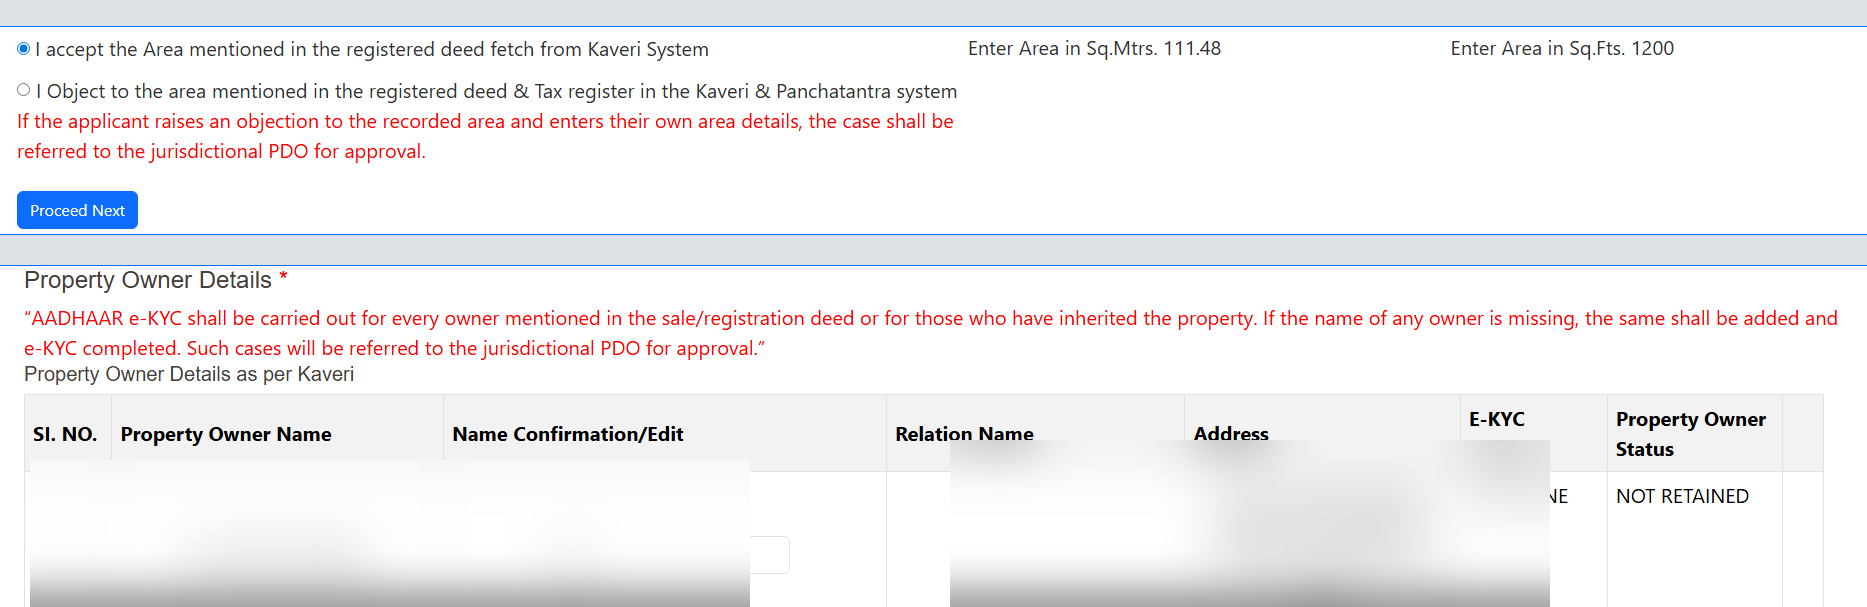
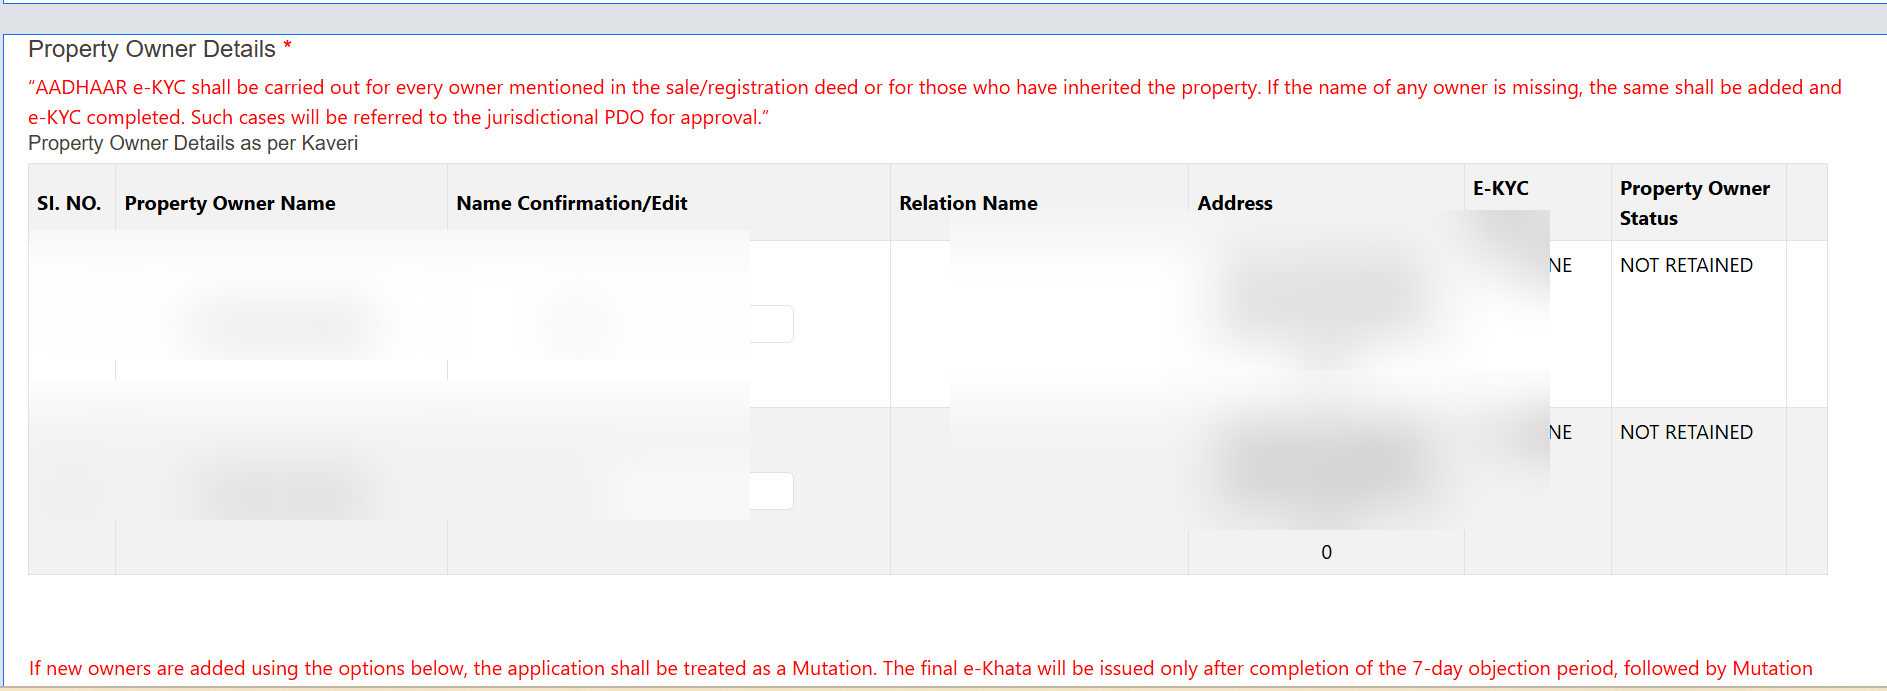
Complete Aadhaar e-KYC for All Property Owners

For each owner listed, click Select and complete Aadhaar e-KYC. The status will change from "NOT DONE" to "DONE" upon successful verification.

โš ๏ธ Aadhaar e-KYC is mandatory for every owner in the sale deed. Missing owners will be referred to the PDO.
โš ๏ธ Adding new owners treats the application as a Mutation, requiring a 7-day objection period.
E-Swathu Owner KYC details (personal details blurred)
Fig 10: Complete Aadhaar e-KYC for each owner listed in the deed (personal details blurred)
11

Answer Rebate and Tenant Details Questions

1. Rebate: Select Yes/No based on your eligibility for government property rebate schemes.
2. Tenant Details: If the property is rented out, select Yes and provide tenant info. Otherwise No. Click Proceed Next.

E-Swathu rebate and tenant details
Fig 11: Answer rebate eligibility and tenant availability questions
12โ€“13

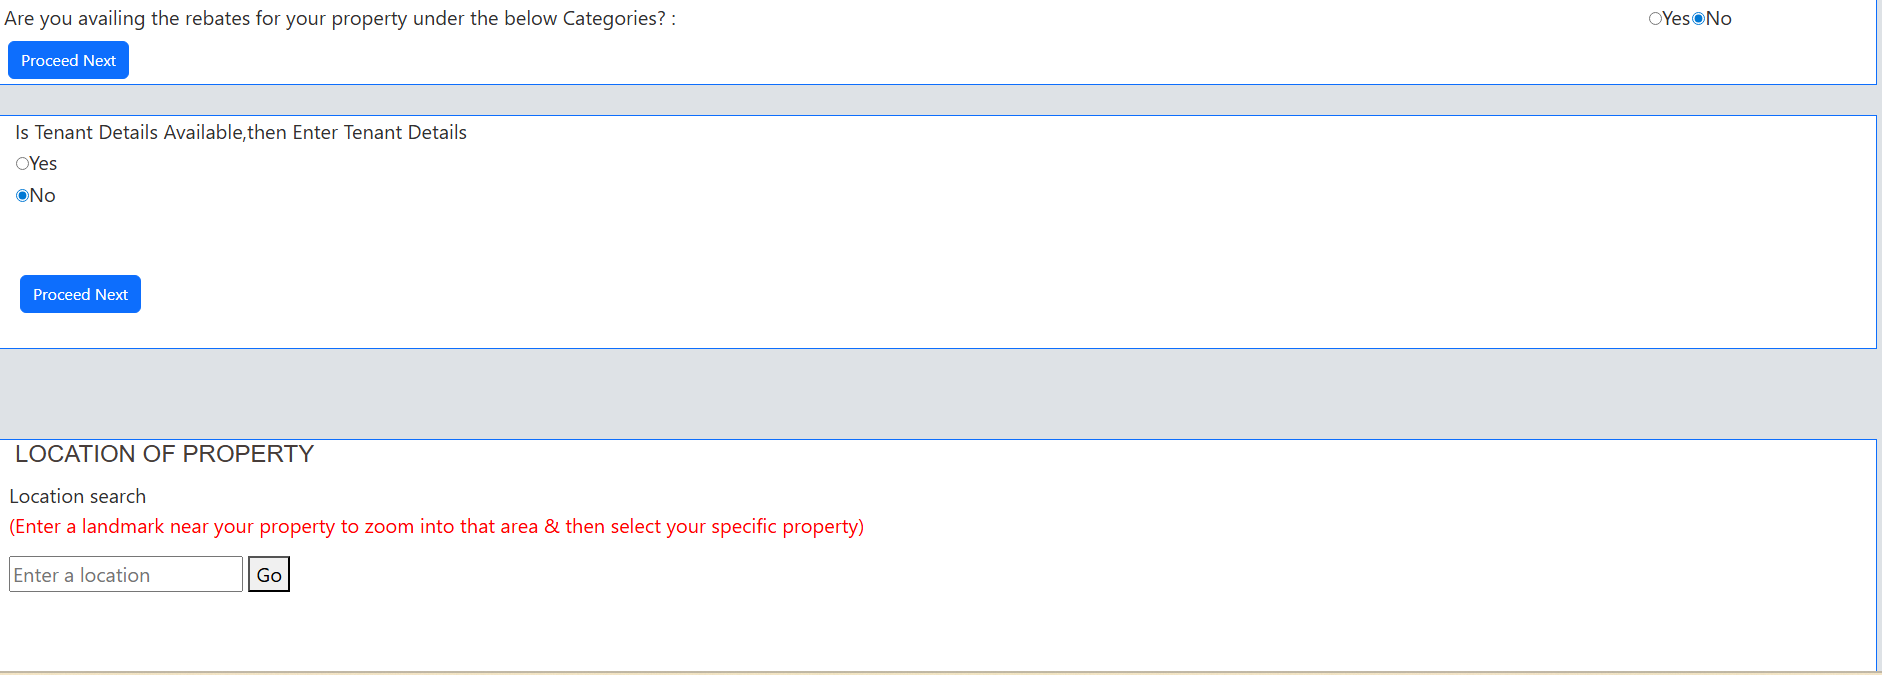
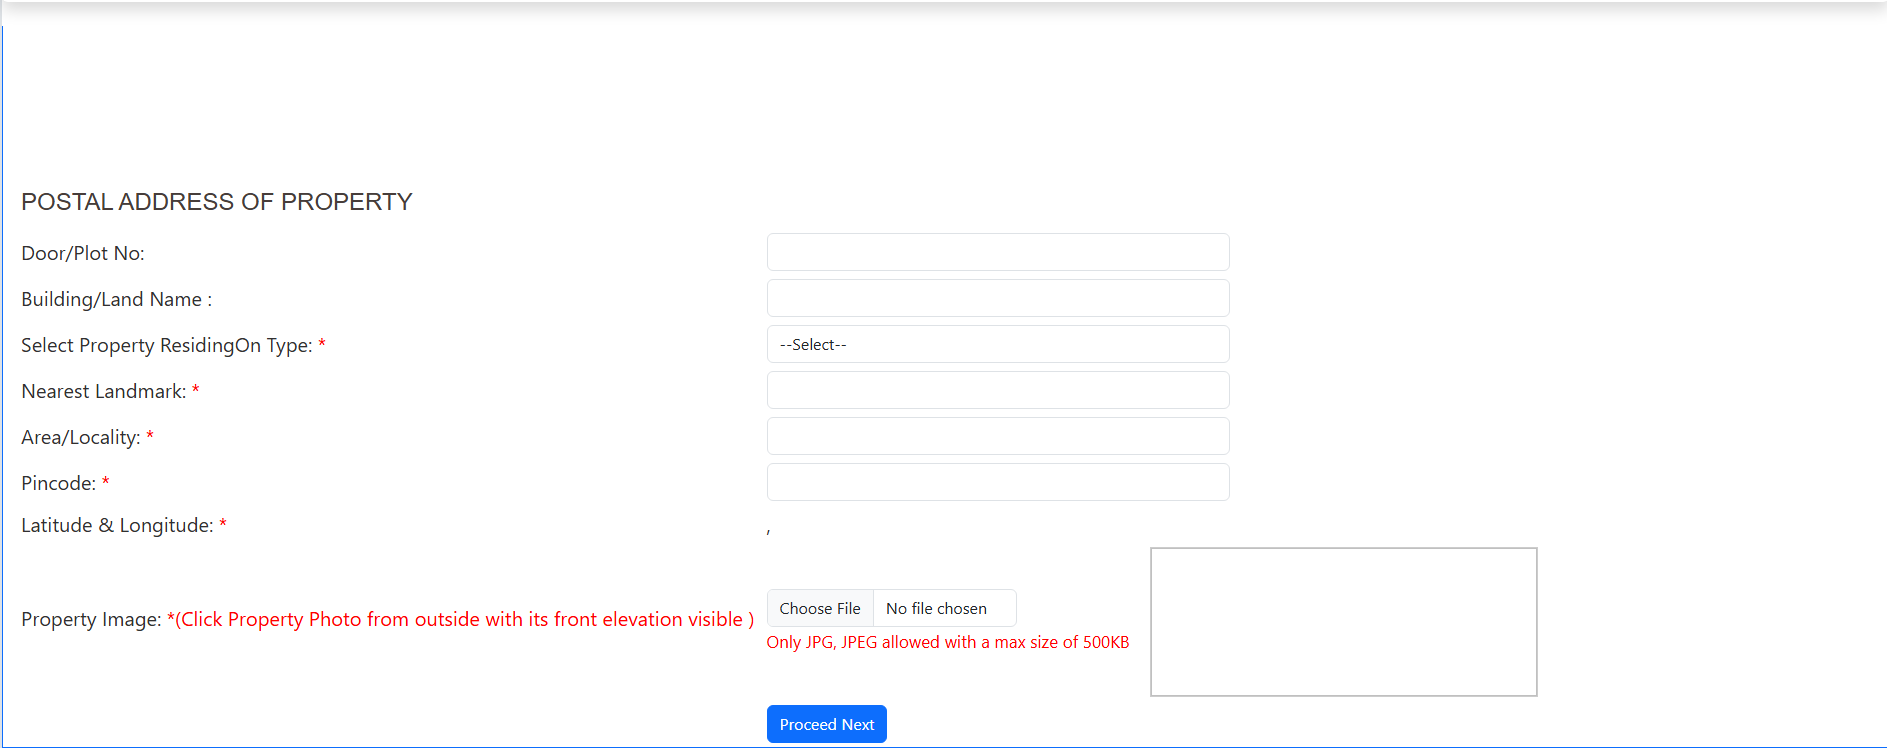
Mark Property Location on Map & Enter Postal Address

Location on Map: Enter a nearby landmark and click Go. Click the exact location of your property on the map to pin it. Latitude and longitude will be auto-filled.

Postal Address: Fill in Door/Plot Number, Building Name, Nearest Landmark, Area/Locality, Pincode, and upload a front-elevation property photo (JPG/JPEG, max 500KB). Click Proceed Next.

E-Swathu postal address form
Fig 12โ€“13: Enter postal address and upload a property photo to complete the application
โœ… After submission you will receive an Application Number. Use it to track status under "New eKhata status based on ePID" on the portal.

Application Process at a Glance

StepActionPortal Section
1Open E-Swathu 2.0 official portaleswathu.karnataka.gov.in
2Click eKhata under Citizen ServicesHomepage
3Select New KhataCitizen Services (eKhata)
4Login via OTP/eCitizen/Login.aspx
5Select property locationProperty Search Form
6Click New ApplicationsCitizen Services menu
7Enter property classification & typeProperty Details Form
8Enter sale deed number, fetch from KaveriRegistration Deed Section
9Accept/object to area detailsArea Confirmation
10Complete Aadhaar e-KYC for all ownersOwner Details Section
11Answer rebate & tenant questionsAdditional Details
12Mark location on mapLocation of Property
13Enter postal address & upload photoPostal Address Form

Frequently Asked Questions (FAQ)

Is there any fee to apply for E-Khata on E-Swathu 2.0?
The application process may involve a payment for Khata issuance. There is a "Download Khatha (Successful Payment)" option in the Citizen Services menu. Check the current fee on the official portal as rates may vary.
What if my property registration happened before 01-04-2004?
Select "No" on the Property Registration Deed Data question. You will need to manually enter or upload your registration documents rather than auto-fetching from Kaveri.
My application is showing as "Returned for Modification" โ€” what should I do?
Go to Citizen Services โ†’ "Returned applications for modification". Review the reason, make corrections, and re-submit. Common reasons include mismatched area details, incomplete e-KYC, or incorrect property classification.
How long does it take to get eKhata approved?
Straightforward applications are typically processed within a few working days. Applications referred to the PDO or involving mutation may take 2โ€“4 weeks due to the mandatory 7-day objection period.
Can I apply for E-Khata through a Common Service Centre (CSC)?
Yes. On the login page, select "Common Service Centre" instead of "Citizen". This is useful for those not comfortable with online processes.
What is the difference between E-Swathu and e-AASTHI?
E-Swathu is for properties under Gram Panchayat limits (rural areas). e-AASTHI is for properties within Urban Local Bodies โ€” municipal corporations and town panchayats. Use E-Swathu for Gram Panchayat area properties.
What is ePID in E-Swathu?
ePID stands for Electronic Property ID โ€” a unique identifier assigned to each property in E-Swathu. Use it to check application status under "Final eKhata status based on ePID" or "New eKhata status based on ePID" on the portal homepage.

Apply for Your E-Khata Today โ€” It's Fully Online

The E-Swathu 2.0 portal makes the E-Khata application completely paperless and transparent. With Aadhaar e-KYC and direct Kaveri integration, property owners in Gram Panchayat limits can get their eKhata without visiting any office.

Visit E-Swathu 2.0 Portal โ†’
E-KhataE-Swathu 2.0 Panchayat PropertyKarnataka Property Gram PanchayateKhata Online RDPR KarnatakaKaveri Integration Property KYC

Published on salarybit.in ยท Information sourced from the official E-Swathu 2.0 portal ยท For official queries, visit eswathu.karnataka.gov.in